Oh my goodness, what a very long time it's been since I saw you! Since everything that I've touched today on the work-related front has just crumbled, I thought I would walk away from all of that nonsense and catch up here; hopefully I will have better luck.
Let's see...I had a partial knee replacement in March (one of the reasons I've been away) and here it is mid-May, so I think I'm alllllllmost finished with that irritating physical therapy. I see the surgeon next week for my 9-week follow up appointment, so we'll see. I have however, been walking a whole lot on the lovely shaded trails out here in The Land of The Woods (aka The Woodlands) and even though it's been so rainy this week (it's been raining and raining and then raining some more), still I've managed to get in several good walks in between the showers and downright downpours. I'm up to walking two miles, woo-hoo. I think that's pretty good, and when I report this to my surgeon, he had better think it's pretty good too. If he makes a meh face, he's not going to get a good reaction from me, especially considering a couple of setbacks that I've soldiered through (an allergic reaction to medical tape resulting in a hot mess/slow-healing incision, then a pulled hamstring on an innocent middle-of-the-night trip to the bathroom). So yeah, there's all that business.
Yesterday I had a lovely birthday and so far, 61 feels pretty good! Although I did laugh at myself on Wednesday when I went to Target and looked at my shopping list: wine, underpants and binder clips. Something about that combination struck me as really funny and I thought "Yep, I'm a sixty-something woman, alright." Sometimes you just need new underpants and wine at the same time, you know?
What I really want to tell you about, though, is how The Quilt turned out! It's been done for some six months, but I need to tell you the tail end of the tale. When we left off on this story, I had just cleaned up the sides and squared it up by slicing off the edges of batting and backing so that the quilt was ready for binding, the last big hurdle in finishing it. Aside from the label, that is, which we'll also get to.
The binding itself is not a big deal, and attaching it is not a big deal either, until you get to the corners. I like a nice mitered corner, and every time I finish a quilt I have to go back and re-remember how to do this! It's as if I block it out as a traumatic memory or something ridiculous like that. There is some fancy algorithm somewhere on calculating how much binding you will need for a quilt, but I can't ever remember that either so I tend to go old-school and just measure each side of the quilt, tack on about 12 inches and call it done.
To make the binding, cut 2 1/2" wide strips of fabric on the bias and sew the strips together at right angles. The reason for cutting the fabric on the bias for binding is that the bias has greater stretch than the straight or cross grain of a fabric, making the binding more durable for wear over the years. Wikipedia defines a fabric bias as such: "The bias grain of a piece of woven fabric, usually referred to simply as 'the bias', is any grain that falls between the straight and cross grains. When the grain is at 45 degrees to its warp and weft threads it is referred to as 'true bias.' " That's more information than you wanted, I know. But still, there might be somebody out there who wants to know! And what if it's a trivia question?! Then you'll know and win prizes and then we'll see who laughs last! Spoiler: me. It will be me laughing last. Bwah-hahaha.
Because I blanked out and forgot to take pictures of making the binding, I'm using some pics from another project to show how the 2 1/2" wide strips are attached. Right sides together, lay one strip over another at a 90 degree, or right, angle. Mark a 45 degree, or perpendicular, line from edge to edge of where the strips overlap...
...and sew along that line...
Trim off the excess fabric above the seam line...
Iron the seam open...
And cut off those points along the straight edge...
Keep sewing the strips together - not all of your strips will be the same length, that's okay - and just keep a running total of the length of your sewn-together bias strip until you get as much as you need (refer to your earlier measurements of the quilt sides plus 12 inches).
Now fold the strip in half with wrong sides together, and iron along the fold. Now you have a really long strip of fabric doubled over with a fold along one length and two raw edges along the other length. It's super long because it's going to be sewn all along the outer edge of your quilt in one piece! This is your Amazing Binding.
Okay, are you ready to attach the binding? I sure am. Let's go. I should mention that this is the point in the process at which I remembered "Duh, I'm supposed to be taking pictures for the blog post!", so here we switch from Old Project Photos to The Real Thing Photos.
To attach the binding, start in the middle of one of the quilt sides, not near a corner. Place the folded binding strip with the raw edges lining up with the raw edges of the quilt, the folded edge is facing the center of the quilt...
Here's a good view of what it should look like from the side...
Leave a tail of about 4 inches
above where you will begin sewing. Once you make your way all around the quilt with the binding and come back to your starting point, that tail is where you are going to be able to tuck the end of the binding in to finish it. Like so many things in sewing (and life, for that matter) it doesn't really make a lot of sense until you get a little further down the road.
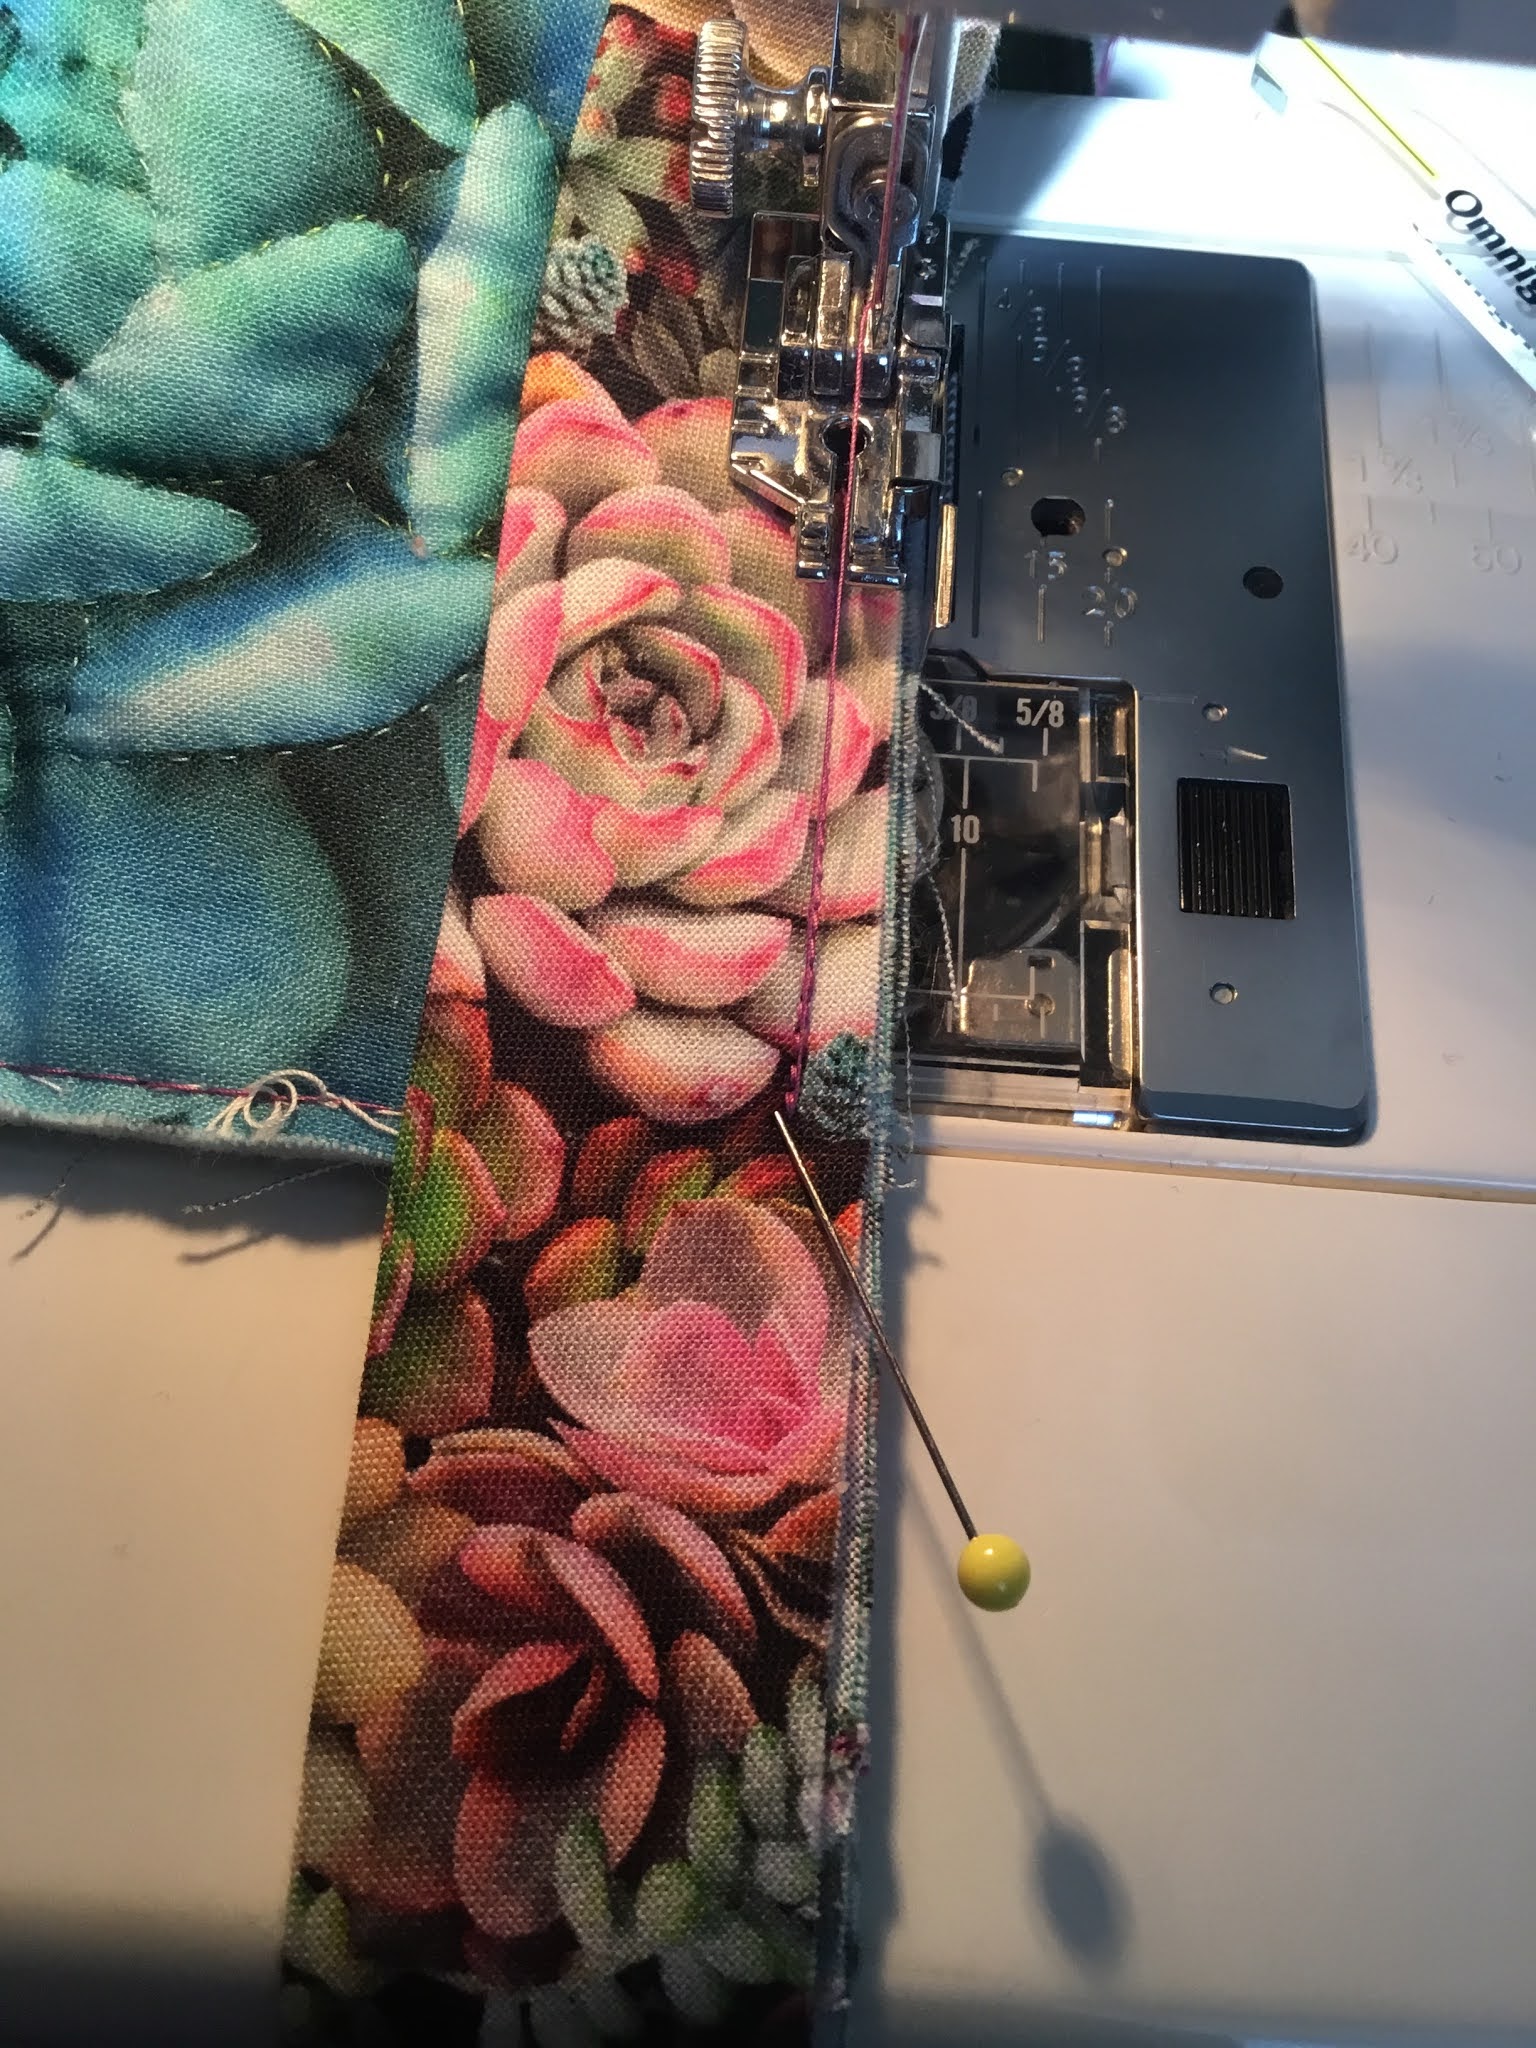
Use a 1/4" seam allowance. This is the width between the edge of the binding/quilt and where the needle goes in. Sew in a straight stitch until you get close to the corner. You want to be very careful about marking at the corner, because you're going to do a little pivot trick and that's what makes A Beautiful Mitered Corner!
Once you get close to the corner, pause stitching but leave everything where it is, with the needle down in the fabric to hold it in place. Using a ruler, mark a point that is exactly a quarter inch from the corner edge...
And, as they say, put a pin in it...
Sew right down to that point exactly, and backstitch a few stitches so it doesn't come loose. Now, bring the needle up out of the fabric, clip the threads, move the quilt out from the sewing machine, and we're gonna pivot. Take the loose binding strip and fold it up over the strip that's sewn to the quilt edge, making a 45 degree angle fold from the point where the stitching stopped at the corner. You don't see that stopping point in this photo, because the loose binding strip has been folded up over it...
Now, keeping the 45 degree angle fold beneath, bring the loose binding strip straight down and align the raw edges against the raw edge of the next side of the quilt. Starting from the top of the corner, sew straight down the edge (using a few backstitches again at the start of stitching), again using a 1/4" seam allowance, until you get a few inches from the next corner.
Repeat the process at each corner and on each side, until you have completed all four corners and are getting close to where you began attaching the binding. Remember that tail at the beginning? When you get about 2 or 3 inches from the upper edge of that tail, pause your stitching but leave the needle down in the fabric to hold it all in place.
This is where we're going to tuck the rest of the loose binding, right into that tail, and then we'll finish. You should have several inches of loose binding left at this point, so you may need to trim some off. I like to have just enough loose binding left to tuck into the tail so that it ends just above the starting point of stitching. One other thing to note: Before you start tucking, turn under the upper edge of the tail so that it looks clean...
After you get the loose binding tucked into the upper tail, sew a straight line down and over the starting point, using a few backstitches at the end. Oh my gosh, you're done sewing the binding on! See? I told you that you could attach that bad boy! Now we're going to flip the folded edge of the binding over the seam allowance and to the back of the quilt, and you'll get to see the Almighty Magic Mitered Corner at last.
Start at some point on the side...
Clip or pin down the binding edge to the back side of the quilt as you go, and when you get to the corner, see how you've got that nice 45 degree angle there?
A) Ignore my badly-in-need-of-a-manicure nails, B) fold that edge right on over, and C) don't forget to clip it down...
Good grief! How gorgeous is that?!
I LOVE IT. OK, now just go all around the quilt to fold the bind over to the back of the quilt, and clip or pin it down. I really prefer these little Wonder Clips, they work great and are a lot easier than pins to use for things like this where you have several layers of fabric happening!
There is a very fancy presser foot for the sewing machine that attaches binding from the front with a clean stitch, as in it doesn't look wonky on either side. Because I don't own this fancy presser foot - and also because I really like hand stitching - I always hand stitch the binding edge to the back of the quilt. It takes time, but I think it's worth it...
And et viola! We're done! Oh wait, except for the label.
Allow me to preach for a moment or two about labels on quilts. Back in the day, most quilts were not labeled except for the fanciest of work. Most quilt historians (yes, that's a real thing) believe the reason for this is that most quilts were utilitarian, meant to be used and worn out. But what happened is that decades later, when quilting was enjoying a resurgence and finally being acknowledged as an art form (deservedly so), antique quilts began showing up in attics, flea markets and estate sales - usually without any kind of provenance about the maker, the recipient, pattern or possible occasion for which it was made. This lack of information was especially frustrating for families who found a quilt that might have been by Great Aunt Dorothy for Grandmother's wedding but nobody can remember, etc. In our family, there were only a few antique quilts that survived. My grandmother was a quilter, but almost all of the quilts she made were done as part of a church sewing circle (my grandfather was a minister), and the quilts were given away to families in need or sold to raise funds for missionary work. I have one that was made by a friend of my Great Aunt Hazel and was gifted to her when they were both young women. None of these quilts were labeled, but we were lucky that my mother handed down oral histories along with the quilts themselves, which I've since documented. Some quilters thought it was vain and prideful to label their work. I see it differently. All quilts, no matter how plain or fancy, are made with love, even if the maker only saw the quilt as a means to keep the family warm.
I hope that my quilts are made well enough to last a very long time, and so I label them to tell the story of the quilt: who I made it for, when and where it was made, what materials it is made of, and if I made it for a special occasion. This quilt was a Christmas gift for my sister and my brother-in-law, so I added that into the quilt. One thing I've also been doing lately is using the selvedges as "borders" on the label, because many textile manufacturers - particularly manufacturers of quilting cottons - have started to use little images rather than the old dots on the selvedges to denote the colors included in the print...
Finally, I took a few close-ups of the finished product on my own bed...
Thank you for going on this quilt journey with me! Even if you have no interest whatsoever in making a quilt, I hope you've learned a bit about what goes into making one. A handmade quilt is a labor of love, and a fine way for even the shyest of quilters to express creativity.


Comments
Post a Comment